September 27, 2007

SHF #35: It's Fig-a-rific!

The most delicious fig I ever tasted was plucked from a neighborhood tree that we obsessively watch and whose fruit we gently squeeze every time we walk by. The fruit was a deep, deep purple and had a drop of figgy dew on its lips. Perfectly ripe, its sweetness melted onto my tongue, leaving behind the crunchy seeds. I believe that the fact that the fig was "borrowed" adds to its allure. The tree this fantastic piece of fruit came from grows on the side of an apartment complex and looks as if it just magically sprouted one day. During fig season we casually stroll a block up to check on the development of "our" figs. We've met a few neighbors too doing the same thing as us.

When I saw that SHF this month was all about figs, I got very excited. I am a recent convert to the Church of the Fig. I have also had my eye on this recipe for quite a while and am glad that this challenge was the kick in the pants I needed to finally make it. Of course, it comes from Claudia Flemming's inspirational book The Last Course. Unlike many other attempts, this recipe was too simple for me to screw up, nor did it involve every single piece of kitchen equipment I possess.

Dive in!

The result is a lovely puddle of golden green, accented by the dark purple of the figs. The creme fraiche center adds a welcome richness and a hint of tart so the sweetness of the melon and figs isn't overpowering. It's drop dead gorgeous too.

Chilled Honeydew Soup with Fresh Figs and Orange Blossom-Scented Creme Fraiche

1 small honeydew, about 2 lbs, or any other green melon, peeled, seeded and cubed
1/4 cup sugar
4 figs, cut into eighths
1/2 cup creme fraiche
1/2 tsp orange blossom water

In a bowl, toss together the melon and sugar. Let sit for 15 minutes.

Puree melon. If you wish, you can strain for a smoother texture. Chill until very cold, about 3 hours.

In a bowl, whisk together the creme fraiche and orange blossom water until slightly thickened.

Divide soup into bowls. Drop a spoonful of creme fraiche into the center and garnish with fig wedges. Enjoy!

Serves 4

Labels: , , , , , ,

July 24, 2007

One Good Way to Stay Cool

I know that people say each summer is hotter than the last but this time it's true! SB has been way hotter than I remember it with no cooling effects of fog for the most part. M. Pants thinks I'm crazy but that's par for the course around here.

When it gets like this, like many people, I don't want to go anywhere near a stove. I prefer great big salads or simple sandwiches. In the past, I wish that I liked gazpacho and other chilled soups but until now, I hadn't found one that I thought was substantial enough for a meal, despite my seriously reduced appetite.

We went a little crazy at the market and bought 6 ears of corn with the plan of making a Mexican-inspired corn-tomatillo soup but we must of been addled by the heat because it is way too hot for that right now. Instead, based on a little research from my monstrous list of recipes I want to try, we discovered a chilled corn soup from a back issue of Bon Appetit. With a few modifications, we had a nice cooling dinner aided by some sauvignon blanc.

Chilled Corn Soup with Serrano Chile-Cilantro Oil and Smoked Trout adapted from Bon Appetit

This soup is very well balanced (and pretty!). The sweetness of the tomato and corn is offset by the bursts of coarse sea salt sprinkled on at the last minute and the heat of the chile oil is tempered by the milk. The smokiness of the trout adds depth of flavor and nudges the soup into the light dinner category. This is meant to be a first course for four but we tuned it into dinner for two.

1/2 cup extra virgin olive oil
4 serrano chiles
1/4 cup cilantro, coarsely chopped
6 ears super-fresh corn, shucked
2 cups whole milk
a handful of tomatoes, diced, we used ones from our garden
3 oz smoked trout, in large flakes
coarse sea salt

In a blender or food processor, combine oil, chiles and cilantro and process until chilies and cilantro and chopped finely and suspended in the oil. Set aside for two hours to combine flavors.

Fill a large pot with salted water and bring to a boil. Prepare an ice bath. Add corn and cook just until done, about 2-3 minutes. I prefer my corn just barely on this side of cooked, so you might cook a wee bit longer. Remove corn from water and shock in ice bath to prevent further cooking.

When corn is cool enough to handle, carefully remove kernels with a sharp knife. Using the flat side of the knife and working over a bowl to catch the juices, run the knife down the length of the kernel-less cob, "milking" it of its remaining juices.

Measure out 6 1/2 cups of whole kernels and combine with milk in the blender. Blend well. Strain until all liquid is removed from kernel mush. At this point, you can discard the kernel bits to have a perfectly smooth soup, but we like our food with some texture, so we stirred about half of the bits back into the soup. Cover and chill.

After two hours, strain the oil of solids and set aside.

Plating: Carefully ladle soup into bowls. We had remaining whole kernels left. so we added them to the bowls and sprinkled the tomatoes over. Arrange fish in center and drizzle oil on soup. Right before serving, sprinkle with salt. Enjoy!

Serves 4 as a first course, or 2 as a light dinner


PS Have any suggestions for places to go wine tasting in SB county for my b'day?

PPS Does anyone know how to add accent marks and tildes to text? The bad grammar is grating.

Labels: , , ,

September 01, 2006

Martha Stewart Is Still A Dirty Liar: Fig Tart with Cream Cheese Filling

I've mentioned before how I love Martha's Dessert book but that it is filled with inconsistencies, "missing" directions and flat-out lies. My theory is that it's because she doesn't want anybody to be able to re-create "her" recipes. That she can't stand the fact that anybody could be as "perfect" as her. Or it could just be that her editing and writing staff for this particular book wasn't paying enough attention. (FYI It's cheaply made too, the binding on mine has cracked and about a quarter of the pages are loose)

Either way, I love the imagery in this book but have resigned myself to the fact that if I make anything out of it, my product will look nothing like hers, and could also possibly be a horrible cosmetic disaster, as my Devil's food cake was, but still taste good.

On Wednesday, I decided to celebrate my first day off by making the partner a nice dinner because he's been particularly supportive and wonderful while I'm going through the transition of returning to school. I hit upon this for dessert, because C loves figs, but always objects when I try to do anything more with them than slice into quarters. I'm not a fan of super-sweet desserts but it wasn't as sweet as I would like, probably because the fruit wasn't as ripe as it ought to have been. I think as the recipe was written, it's more like a composed fruit and cheese course than anything else. If I make it again, I'll add a bit more sugar to the filling.


Fig Tart with Cream Cheese Filling, adapted from Martha Stewart's Desserts

Have:

6 TB unsalted butter, room temp
1/2 cup sugar
2 egg yolks
2 tsp orange peel, grated finely
1 cup AP flour
1/3 cup cornmeal (I used really coarse meal and didn't enjoy the extra crunchy grit, you might)
1/2 tsp salt

4 oz cream cheese, room temp
1/2 cup creme fraiche
1 1/2 TB powdered sugar (or more, see above)
2 tsp vanilla paste or extract
2 tsp orange juice
2 tsp orange peel, grated finely
2 tsp orange blossom water, or more to taste
1 pint black or purple figs, perfectly ripe, stemmed and quartered
1/4 cup fig or currant jam (I used currant)
2 TB port, or red wine


Begin:

In the bowl of an electric mixer, or food processor, cream butter and 1/2 cup sugar until light and fluffy. Add yolks and 2 tsp peel and mix until just combined.

In a large bowl, whisk flour, corn meal and salt.

Add the dry ingredients to the butter mixture and mix until dough just barely comes together. Flatten dough into a disk and wrap with plastic. Chill until firm enough to handle, about 1/2 hour.

Butter a 4"x14" rectangular tart pan (I actually bought a kitchen gadget just for this one recipe, I'm relatively certain that you could use a standard sized tart pan and the proportions would still work out). Remove the cornmeal dough from the fridge and roll out between two sheets of plastic wrap (or two silicone liners, if you have them) to a 1/8" thickness (You will probably have a ton of dough left over, I did. I made mini-tarts out of it). Very carefully, transfer the rolled out dough to the pan. It will most likely tear. Not a problem, since it isn't traditionally flaky tart dough, you can patch it together easily. Press dough into the pan, making sure that the edges are flush with the pan sides. Chill 20 minutes.

Preheat oven to 350F. Prick the dough all over with a fork to prevent bubbles. Here was my fatal mistake. It is also important to line the dough with foil and fill with pie weights, or dried beans that you don't ever plan on eating (I have a bag of pintos for this purpose). Martha did not include this in her instructions ands the sides of my tart crust sunk to the center. She is a liar or at least an omitter! Bake your weighed crust for about 15 minutes, or until set. Then remove the weights (or beans) and foil and cook for another 3-5 minutes, or until crust is slightly golden. Remove from oven and let cool on a baking rack. When cool, free from the oppression of tart jail, or remove sides and transfer to a serving "platter". If you have one oddly shaped enough for the rectangular tart. I used a cutting board.

Meanwhile, beat cream cheese until smooth. Add creme fraiche, vanilla, orange peel, juice and 1 tsp blossom water. Mix until well combined. Cover and chill 30 minutes.

When the crust is cool, fill with the cream cheese mixture. Arrange the figs on top, pressing slightly into the filling.

In a small pan, combine jam and port/wine. Heat over medium-high heat and bring to a boil. Stir frequently. Reduce heat and let simmer until mixture is thick and syrupy, about 2 minutes. Let cool slightly and whisk in 1 tsp of orange blossom water. Brush glaze over the figs. Serve, finally.

Labels: , ,

August 25, 2006

SHF #22 K's Birthday Jam

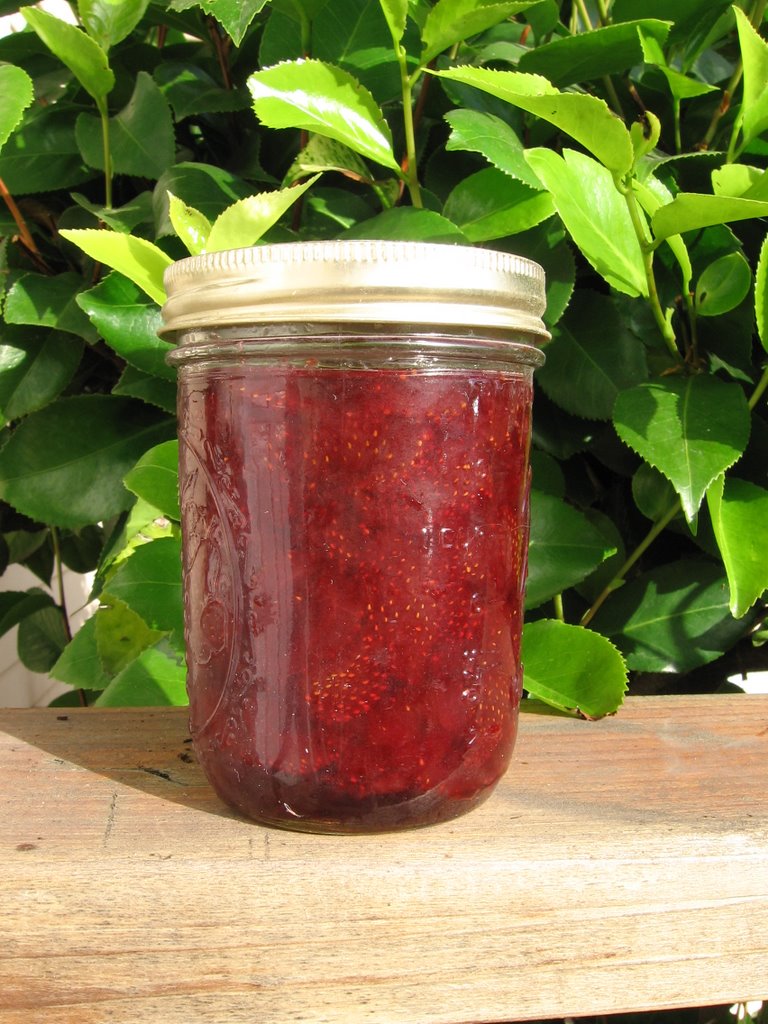
For the past four years, I have gifted K, the partner's mom, with strawberry jam for her birthday. I didn't even realize that SHF (Sugar High Friday) this month and K's day coincided pretty nicely, until yesterday. So here is my second addition to the SHF phenomenon.

In the past, I have just cooked the berries with a smaller then typical amount of sugar my secret ingredient and strongly advised that the jar be kept in the fridge. This method isn't really jam, more like a slightly thickened strawberry sauce. Depending on what I did that year, the "jam" was quite often runny. This year however, armed with my preserving book, I made an actual recipe for jam, complete with the scarily obscene amount of sugar. Then I really and truly canned it. I am slightly paranoid that K will get botulism and die but I don't think that will actually happen,at least I sincerely hope it won't. Without further ado, here is my recipe for strawberry jam with a twist.

2 lbs strawberries, preferably organic/pesticide free
2 lbs sugar (about 4 1/2 cups)
2-4 tsp freshly squeezed lemon juice
2-4 tsp orange flower water, or to taste

If you are planning on canning this, everything must be scrupulously clean.

Place a saucer in the freezer. Trim the greens off the berries and cut fruit in half. Combine berries and juice in a very large pot and cook over medium-low heat until fruit begins to break down, stirring occasionally, about 12-15 minutes. When fruit is softened, crush about half of the berries against the side of the pot. Add the sugar and stir until well combined.

Turn heat up to medium and let mixture come to a boil. Try not to stir once this has happened. Skim off the foam that comes to the top. If you ever read M.F.K Fisher's essay, "The Measure of My Powers", you will find this to feel like a slightly Proustian exercise.

After jam has boiled for ten minutes, remove the saucer from the freezer and place a few dabs of jam on it. Let cool for a minute. Poke with your finger, if it wrinkles, remove jam from heat and
let cool. If it does not wrinkle, let cook for another two minutes and test again. Conversely, the jam will be done once it measures 220F (this did not hold true for me, but it might for you). After jam is removed from heat, stir in the orange flower water.

If you plan on canning, which I will not give instructions for because I don't really know what I am doing and I don't want anyone to get sick, let jam cool for 5 minutes and fill jars. If you are not canning, let jam cool to room temp, and pour into very clean jars. The jam will keep in the fridge about six months.

Labels: , , , , ,

August 21, 2006

Reason #49 to Have a Garden: Turkish Herb Salad with Fried Eggplant

I don't really know if this is authentically Turkish or not. Unfortunately, I don't have that much understanding of the divisions between Middle Eastern foods. Anyone out there who knows if this is the real deal or not? Even if it isn't, it's still delicious.

We first made this salad last summer when it appeared in the August '05 Bon Appetit. I vowed that we would grow our own nasturtium just for this salad and the partner was kind enough to defer to my culinary wishes. I only wish that we had enough space and sunshine to grow everything else for this salad. The mint, chives and flowers came from our tiny plot, but our basil is being devoured by some caterpillars and everything else will just have to wait until we win the lottery and buy a house.

I realize that I am on a huge eggplant kick lately which shows no signs of abating. Tonight we're having eggplant stir-fry, and sometime later this week we're going to have this pizza again. The partner just pointed out to me that summer is two-thirds over, might as well eat all the eggplant (tomatoes, strawberries, melons and summer squash) that we can to hold us over til next summer.

Turkish Herb Salad with Fried Eggplant adapted from Bon Appetit

Have:
1 shallot, minced
Juice of 1 lemon
1 eggplant, sliced into 1/2" thick
1/3 to 1/2 cup olive oil
2 cups arugula
1/3 cup basil leaves
1/3 cup parsley leaves
1/3 cup cilantro leaves
1/4 cup mint leaves
1/4 cup chives in 1/2" lengths
Nasturtium flowers, if you have some

Combine shallot and lemon juice in a small bowl.

Lay out eggplant in a single layer on a flat surface. Salt and pepper eggplant slices on both sides. Set aside.

Combine all greens, except for the chives. Wash and spin dry. Transfer to a large bowl. Add chives and toss to combine. Salt and pepper greens.

Whisk 2 TB olive oil and salt and pepper in with the shallot and lemon juice.

Heat 4 TB olive oil over medium-high heat in a large saute pan. When hot, add as much eggplant as will fit without overcrowding. You might have to cook the eggplant in batches. Fry until golden brown, about 5 minutes per side. If the pan looks dry, add more olive oil. Layer a plate with paper towels. When the eggplant is done, remove from pan and place on lined plate.

Toss greens with vinaigrette. Divide salad among plates. Lay eggplant on top of greens. Decorate with nasturtium, if you have them.

Serves 4 people as a starter or 2 greedy people dinner.

Labels: , , , , , ,

August 10, 2006

Bronzed Eggplant Pizza

This pizza is so good we've had it twice in the last two weeks. Both times we ate the whole thing in just one sitting. The only other meal that we've greedily eaten repeats of this summer is our home grown tomatoes on sourdough with mayonnaise (why did I never try this before? It's mind-boggingly delicious). Of course, we couldn't just follow the recipe as is though. We upped the eggplant in a major way (try three times as much) and included chilies from our garden, instead of using dried chili flakes. Do yourself a favor and try it at least once while eggplant is still in season. You won't be sorry. Here it is with our modifications:

Bronzed Eggplant Pizza, adapted from the Gourmet Cookbook

Procure:
your favorite pizza dough
2 lbs small-ish eggplant, cut into 1/3-inch thick slices
5 TB olive oil
salt
1-2 TB cornmeal
3/4 cup coarsely grated whole-milk mozzarella
1/3 cup Asiago or Parmesan
2 TB minced garlic
2 TB chopped chilies or 1/4 tsp dried red chili flakes

Preheat your broiler, or if you don't have a usable one like us, heat your oven up to 500F. If you have a pizza stone, leave it in the oven (if you don't all ready) so it can warm up. Arrange eggplant on a baking sheet in a single layer. You might need to use another sheet or do this in two batches. Brush eggplant with 3 TB oil and sprinkle with salt. Broil about 2-3 inches from the heat source(or bake), turning once, until golden brown and tender, anywhere from 6 to 16 minutes total. Set aside.

Heat remaining oil in a small fry pan and cook garlic and chili, stirring until fragrant, about 30 seconds to one minute.

Shape pizza dough to a 14-inch round. If you don't have a stone, roll it so it will fit on a large baking sheet (or you could make 2 smaller pizzas). Sprinkle evenly stone or baking sheet with cornmeal. Place dough on heated stone or baking sheet. Combine cheeses in a bowl. Sprinkle 1/4 of cheese on pizza, leaving a 1/2-inch border. Layer eggplant over the cheese. Pour garlic-chili oil evenly over the eggplant. Sprinkle pizza with remaining cheese. Bake until crust is golden brown, about 12-15 minutes. Cut into wedges and consume. Try not to fight with dinner companion(s) over last piece.

Labels: , , , ,

August 04, 2006

Birthday BBQ Menu

For N who just couldn't wait:

One of my favorite parts about having a birthday is throwing myself a party. I decided that for my entrance into my second quarter century, I wanted to be surrounded by my women folk, so the poor partner gets kicked out of the house and I get to spend a fantastic evening with some of my favorite people. The most important part of this party planning is, of course, the menu. I wanted lots of summer-y food, some of my favorite things to eat (and make), while also trying to include some recipes I've had my eyes on. So, with much editing and renting of garments, here is my birthday BBQ feast:

White Sangria (recipe coming here)
Ice Tea

Spicy Chickpeas and Pistachios
Spinach Dip with Greek Flavors
Perfect Salsa
Corn Chips

Vodka-Spiked Cherry Tomatoes with Pepper-Salt

Grilled Chicken Sandwiches with Sage Pesto and Apple on Homemade Grilled Foccacia
Grilled Ratatouille Salad
Grilled Corn on the Cob with Chive Butter

Butter Biscuits with Strawberries in Balsamic Vinegar and Whipped Cream

Labels: , ,

July 17, 2006

RECIPE: Squash Blossom Frittata

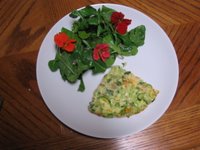
This was our flowery lunch yesterday. We had zucchini blossom frittata with an arugula salad decorated with nasturium and chive blossoms from our garden. I feel a bit foolish that I spent $2 on 6 zucchini blossoms from the Very Expensive Farmer's Market Stand (tm) especially since if I had my dream garden, I'd be tearing my hair out over how many squash we have all ready and plucking the flowers off the vines just to hold back any more squash production. One day, I will have the garden of my dreams and on that day the heavens will open, angels will sing and I will curse my overabundance of produce. Today is sadly not that day.

Squash Blossom Frittata from Gardeners Community Cookbook edited by Victoria Wise

Gather:

6-8 squash blossoms
2 TB butter
2 small summer squash, sliced thinly
2 green onions, sliced thinly
4 eggs
1 TB milk
2 TB chopped fresh herbs, I used parsley but I think mint would also be lovely
1/4 cup grated Parmesan or Pecorino

Wash blossoms extremely well. Buggies like to hide in them. If you're feeling particularly exact, you can pat them dry too. Guess what I did? Slice blossoms thinly.

Combine eggs, milk, herbs and salt and pepper in a bowl. Mix well.

Preheat broiler.

Melt butter in oven-safe saute pan. Add green onions and squash. Saute two minutes. Add squash blossoms. Stir to combine quickly. Add eggs. Cook for three minutes, or until eggs are mostly set. Sprinkle cheese on top and run under broiler for three minutes, or until frittata is puffed and golden. Serve with flowery arugula salad and good toast with butter.

Labels: , , , , ,

May 24, 2006

RECIPE: Delicious Dinner in Under 20 Minutes

Guaranteed or your money back!

When tomatoes are ripe, I eat this at least once every two weeks. It's well balanced, spicy, a bit salty, a little sweet, cheesey and mostly healthy. It's also a snap to put together.

Pasta with Tomatoes, Olives and Arugula

Adapted from Jamie Oliver's The Naked Chef Takes Off

Gather:
8 oz dried long skinny pasta (spaghetti, fettuccine, etc.)
2 TB olive oil
2 or 3 garlic cloves, minced
1 chile, minced (or however much you like)
1/3 cup good quality black olives (I prefer Kalamata), pitted and coarsely chopped
1 pint cherry tomatoes, halved if large
4 oz arugula, coarsely chopped
salt and pepper, to taste
Parmesan or Pecorino, freshly grated

Heat a large pot of salted water over medium heat (This would be a good time to start prepping the veg). When water is rapidly boiling, add pasta. Cook until al dente, about 5-7 minutes.

While pasta is cooking, heat oil in a large saute pan. When hot, add garlic and chile. Cook until fragrant. Add olives and tomatoes. Cook just until tomatoes begin to break down. If the pasta is not ready, set aside.

When pasta is done, drain, reserving some of the cooking liquid. Return pasta to pot. Add tomatoes and arugula. Toss until well combined. The heat of the pasta will wilt the greens. If dry, add some of the cooking water to moisten. Salt and pepper generously. Serve, passing cheese to grate over.

Labels: , , , ,